otago / summarydetails
html5 summary details for TinyMCE
Installs: 1 514
Dependents: 0
Suggesters: 0
Security: 0
Stars: 0
Watchers: 7
Forks: 1
Open Issues: 4
Language:JavaScript
Type:silverstripe-module
Requires
- silverstripe/framework: ~3.1
This package is auto-updated.
Last update: 2024-04-15 09:18:33 UTC
README
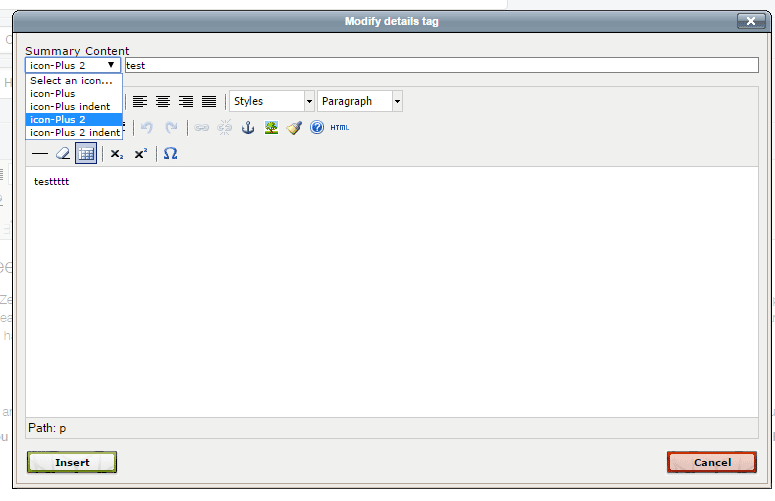
This tinyMCE 3.x plugin allows for rich editing of the HTML5 <summary> <details> tag; enabling you to create, edit, and delete summary tags in an easy to use popup. It also allows (through an optional setting) icons to be used inside the summary tag. Avoiding such headaches as double embedding, rich text formatting mistakes, and tag soup.
Installation
You can install this module via composer if you’re using SilverStripe: composer require otago/summarydetails.
Non SilverStripe tinyMCE users can download the archive and copy the files locally. You’ll then need to edit ssdetails/tinymce_ssdetails/details.htm and point tiny_mce_popup.js & editor_plugin_src.js to your tinyMCE locations.
After that you’ll need to tell SilverStripe to load the files, by adding the following to your _config.php:
		->enablePlugins(array('ssdetails' => '../../../summarydetails/javascript/tinymce_ssdetails/editor_plugin_src.js'))
		->addButtonsToLine(3, 'ssdetails', 'ssremovedetails')
		->setOptions(array(
			'details_icons_class' =>
			// an array of icons to use for the summary tags. [classname, class title],[...etc]
			// an optional third value can be used for the summary class
			// the first array item must be unique
			'[icon-Plus,icon-Plus],' .
			'[icon-Plus smallerPlusMinusIcon, icon-Plus indent],' .
			'[icon-Plus2, icon-Plus 2],' .
			'[icon-Plus2 smallerPlusMinusIcon, icon-Plus 2 indent ]'
		));
Note the custom details_icons_class option, you’ll want to leave this empty or modify with your local icon set.
Again, non SilverStripe users will have to load the plugin and add the buttons to a line manually.
Usage

There should be two icons added to your TinyMCE instance, a modify, and remove button:
- Clicking the add details icon will insert a new one at the bottom.
- Selecting text then clicking the add details button will populate the summary text.
- Selecting an existing details tag will edit the selected tag.
- Selecting an existing details tag and clicking the remove button will remove the details tag.